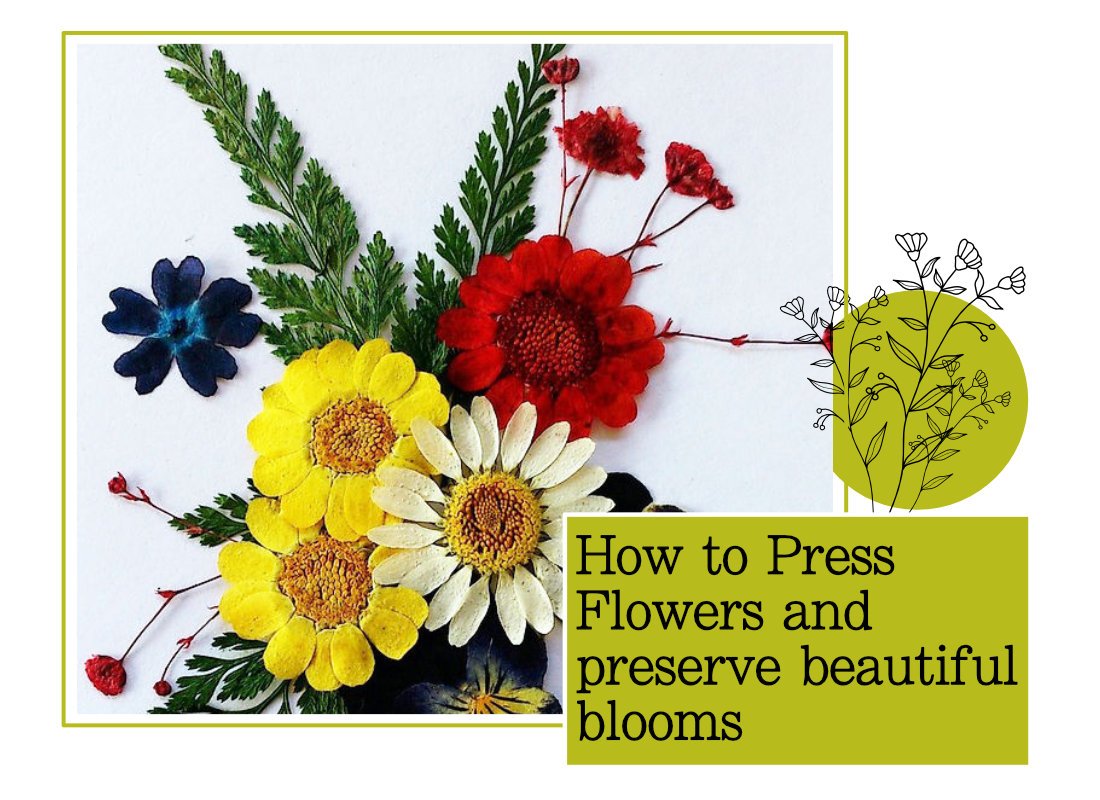
How to Press Flowers and preserve beautiful blooms
Discovering how to press flowers is a wonderful way of preserving those beautiful blooms. Pressing flowers keeps the colour and detail and can be used in oh so many ways.
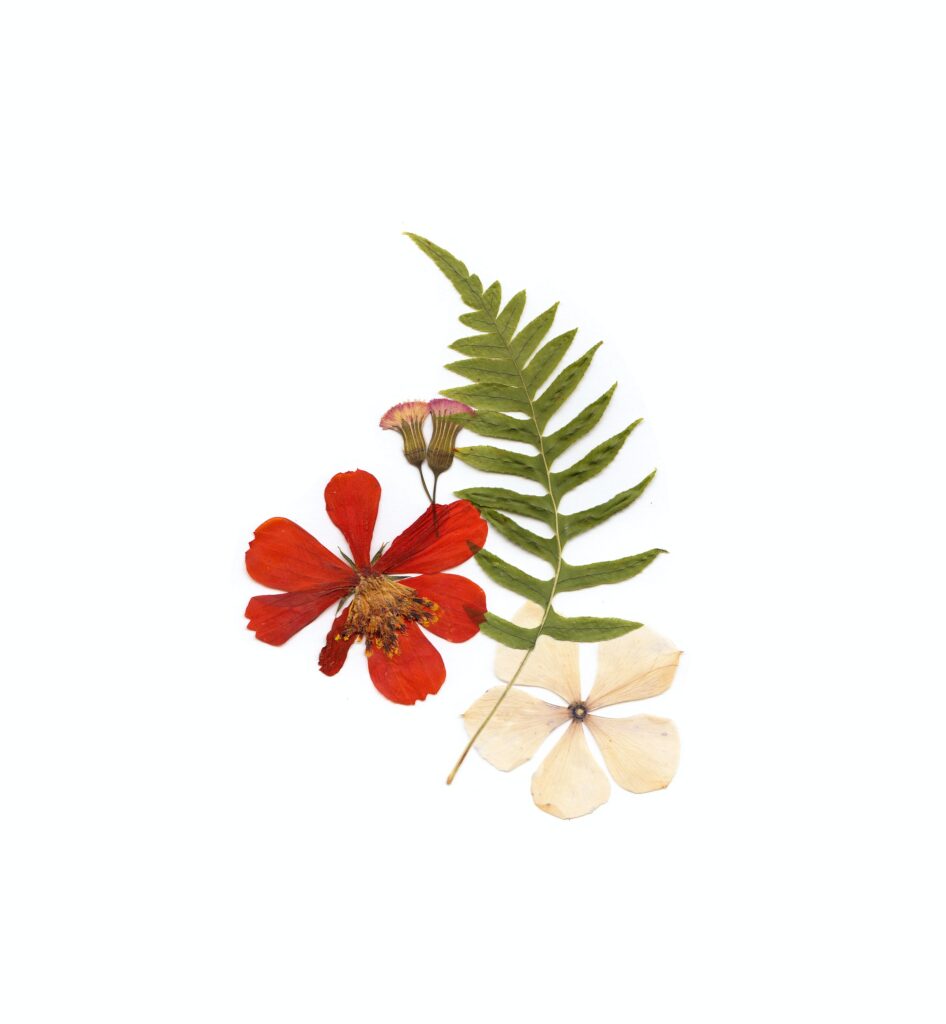
Your not just limited to pressing flowers either, leaves and greenery press just as well and can be pressed any time of the year. Perfect for christmas crafts and decorations.
I am always pressing flowers all year round as I just love preserving nature and being able to have a collection of pretty natural resources to use in craft projects.
Pressed flowers make a fantastic addition to journals, scrapbooks and can be used in a variety of craft projects for kids and the grown ups!
Pressing flowers is really easy and you don’t need many materials. Personally I prefer to press mine in a press, but I also use books, makeshift presses and have even pressed them using an iron!
Pressing flowers takes out the moisture stopping flowers from ageing so pressed flowers can last a long time, retaining their colour and detail for many years.
How to press flowers
There are four main methods for pressing flowers, depending on what resourses you already have, how quickly you want them pressed and what size flowers you are pressing.
1. Using a flower press
2. Using a book
3. Using an iron
4. Using a microwave

Choosing your flowers to press
When choosing your flowers consider the thickness of the flower, flatter petals and smaller flower heads such as pansies will dry quicker than bulkier heads such as roses.
Most flowers will press, experiment with different colours and flower shapes, you will be pleasantly surprised by the results!
Make sure you have permission to pick the flowers, it might be tempting to ‘borrow’ a beautiful bloom from a neighbours garden but they might not appreciate you taking their prize rose!
Pick your flowers on a dry day after the morning dew has evaporated. You want your flowers to be as dry as possible before pressing but not too wilted!
Arrange your flowers, removing any excess leaves or foliage. Some flowers may need opening or flattening before pressing, bulkier flower heads may press best best cut in half or using individual petals.
When you have collected and arranged you beautiful flower collection it is time to start pressing!

Using a flower press
My personal prefference is pressing flowers in a press. They can be bought from most craft stores and online. Most are quite small but work perfectly for pressing smaller flowers and leaves. They are usually inexpensive and will last you ages, I have some I have had for many, many years. You can buy replacement blotting or parchment paper so can be reused numerous times.

How to use a flower Press
Flower presses are made up of two main boards with layers of cardboard and blotting or parchment paper in-between. The press is held together by four screws and tightened with wing nuts.
To use your flower press, undo and remove the wingnuts. Most flower presses come with perfectly sized cardboard and blotting paper. Starting on the bottom on the base board of your press, place a piece of cardboard then blotting paper.
Place your flowers for pressing on top of the blotting paper, then cover with another sheet of blotting paper, then cardboard. Creating a ‘sandwich’ with your flowers inside.
This can be repeated adding more cardboard, blotting paper and flowers until your press is full.
Make sure each layer of flowers has blotting paper underneath and on top as this will draw out the moisture from the flowers.
I have also found that using flat cardboard works best as textured card tends to mark delicate flowers.

When you have your flower press sandwich ready place the top board on and screw on your wingnuts. Store your press in a dry, warmish place.
Pressing time will depend on the flowers you are pressing but most will be pressed and dried within 2-3 weeks. Bulkier flowers and leaves or greenery may take longer.
Carefully check if dried, if not just replace the blotting paper, tighten back up and leave for another week or so.
Using a book
Such a simple method and one anyone can do, most people have a great big book at home somewhere (usually one which never gets read!) which would be perfect for flower pressing.
How to press flowers with a book
All you will need is some blotting paper, parchment paper, coffee filters…. any type of paper which will soak up the moisture from the flower will work. Try not to use kitchen roll or tissue as this tends to mark the flowers and doesn’t always soak the moisture evenly.
Lay your blotting paper onto a page in the book (remember which page!) and place your chosen flowers on top. Lay blotting paper over the flowers and close the book up.
Place something heavy on top of the book and leave for a couple of weeks. Thicker flowers will take a bit longer to press but most will be ready within 3 weeks.
Using an Iron
I have tried this method with varying results (not all of them good!) Probably my least favourite method but is handy to know if you needed some pressed flowers asap.
Use your iron on a very low setting and turn off the steam.
Place your flowers on a sheet of parchment or blotting paper, then place another sheet on top.
Gently iron the paper for about 15 seconds, let cool then iron again. Don’t leave the iron on the paper too long or the flowers will burn.
When cooled check if your flowers are pressed, if not iron again.
Using a microwave
This is another handy method if you want your pressed flowers quickly. Also good for larger flowers.
There are flower presses you can buy specifically for using in a microwave, I havent tried one as I prefer my trusty old standard flower presses. I am tempted to buy one though just to see how good they are!
Microfleur is a respected brand, the presses are expensive but have good reviews. Hobbycraft also sells an instant flower press designed for using in a microwave.
Using the microwave method without a press is still doable, you just need printer paper, kitchen roll and a heavy microwavable baking dish.
Fold your paper in half and place your flowers inside, put kitchen roll on top of the flowers then fold your paper over.
The timing will be a bit of trial and error! Give the flowers an initial burst of 30 seconds, then keep giving them 10 seconds until they are ready.
Not my favourite method as some flowers don’t press very well and would probably work better with a microwave flower press – worth a try though!
What can you use presses flowers for?
Oh, there are so many uses for pressing flowers. I used to press flowers just because I enjoyed it but am surprised myself how many beautiful craft projects you can make using pressed flowers.
Pressed flowers can be used in clay projects, candle making, resin projects and homemade soaps. They are also perfect natural decoration for paper craft projects and card making.
Just store your flowers in a dry place, I tend to store mine in between paper in folders or tubs for when I need to use them. You could of course make a beautiful journal…. ermmmm now thats an idea! One I will have to try – I think!
One thought on “How to Press Flowers and preserve beautiful blooms”